I know a lot of artists and many of them like to make their own dip pens to draw with ink - but none of those I have spoken to, during this project, make their pens in this traditional way.
This tutorial is, in many ways, the same as for the feather quills listed earlier. However, reed pens would have been used in areas where reeds were easily available, like the Somerset Levels although there is evidence of their use in ancient Egyptian sites. Unfortunately, the reeds are quite hard, so do not hold a point for long which led to them being replaced by feather quills. But they are easily gathered and can be resharpened so well worth a try.
The best reeds are the strongest, so would have been from bull rushes but any reeds that you find can be used. You gather them during the winter from reed beds, or sometimes by streams or ponds. It is best to pick the reeds once they are dry and cut them from as near to the ground as possible, as they tend to be strongest. I understand that, if you don't live in an area where reeds grow, you can use a bamboo but you will need a very sharp strong knife to cut through it
I do know that some people soak the end of the reed for several hours and then let it dry before cutting the nib, I didn't do that and found the pen worked well anyway.
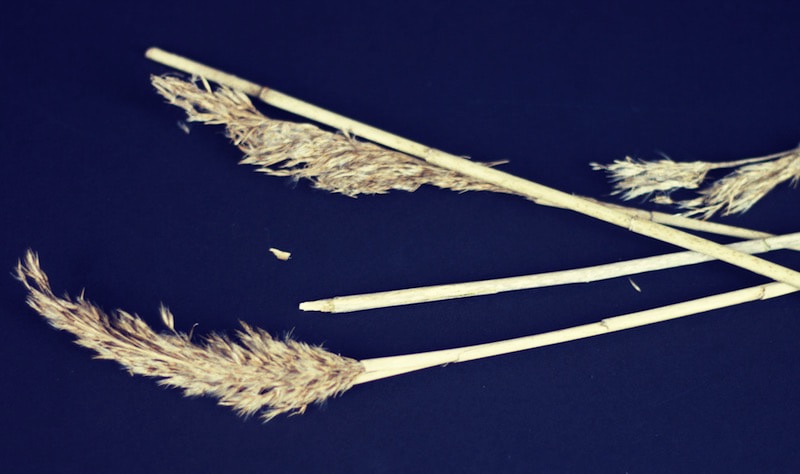
Dried reeds, ready for dressing
Once you have gathered your reeds you need to remove any loose material
detail of reed ready for cleaning
The loose bits will just pull away quite easily leaving a solid, firm length of reed ready for cutting

Loose material removed from reed
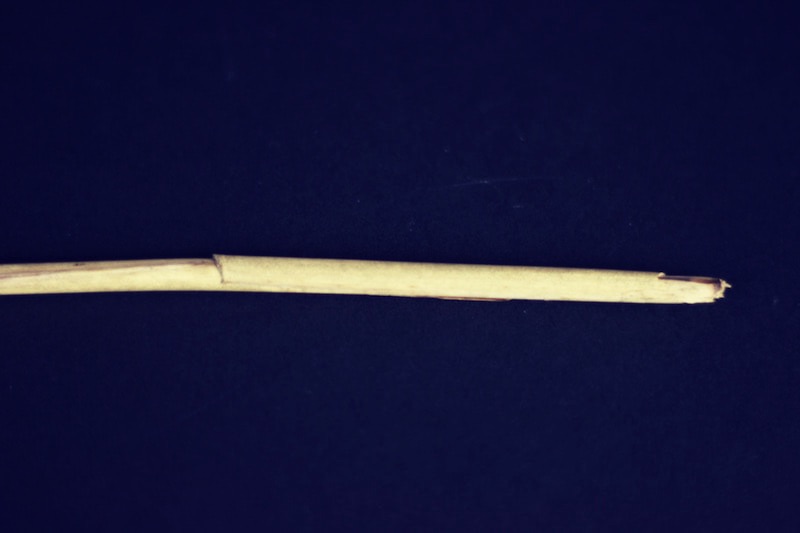
Once you have a relatively clean, smooth length of reed you are ready to start thinking about cutting the quill. The strongest place is approx 1 inch from a joint, this is always where I cut my quill. If you look at the cleaned reed you will see that it divides itself up into a series of horizontal lines, where it is slightly thicker. Choose one of these, near the bottom of the reed and trim it approx 1 inch from the horizontal line. If you look carefully at the picture below you can see a line to the left of the cut which is the joint.

reed trimmed approx 1inch from joint
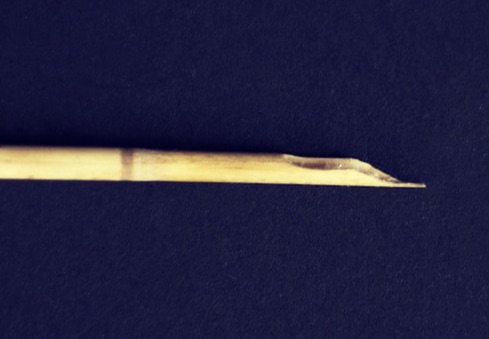
The cutting process is nearly exactly the same as for a feather quill. First make your scoop cut. Cut onto a flat surface with a sharp blade, it is better to make a series of cuts as it is easy to crush the reed. You can see from the picture below the shape you are aiming for.

Detail of scoop cut
You will now make a second scoop half way along the length of the first. Cut each side separately and only take small sections at a time.

Second scoop cut
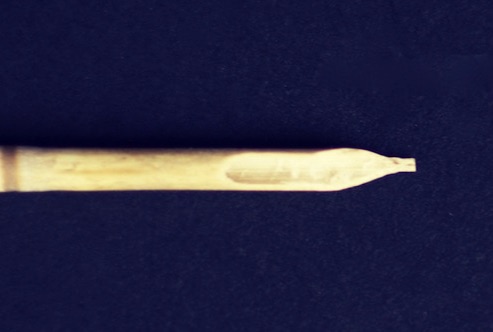
Once the two sections are cut you then need to trim each side so that you are left with a flat section for the nib. It is hard to explain but I am hoping that you can see, from the image below, the sides have been further trimmed to produce a flat section at the front of the pen, this will for the nib and makes contact with the paper.
Trimmed nib
I then, carefully, trim the nib to make it thinner. This is done by using a sharp blade to bevel the underside of the flat section you just made. You are just shaving the underside to make a finer tip, start a couple of mm from the end of the tip and gently shave towards the end. You can also make sure that the end of the nib is square by cutting across the nib - remember to lay the pen flat on a board so it is supported before you cut.
shaped nib
I think it is this next bit that is quite different from other reed pens. You need to make a small hole in the nib which provides a reservoir for the ink. Position the reed as pictured below. I am using an awl, from my book binding tools, but you could use a needle. Press down, gently, in the inside of the reed. If you twist the awl/needle from side to side you will not need to use so much pressure. Let the tool do the work, don't use force as this is a very delicate cut.
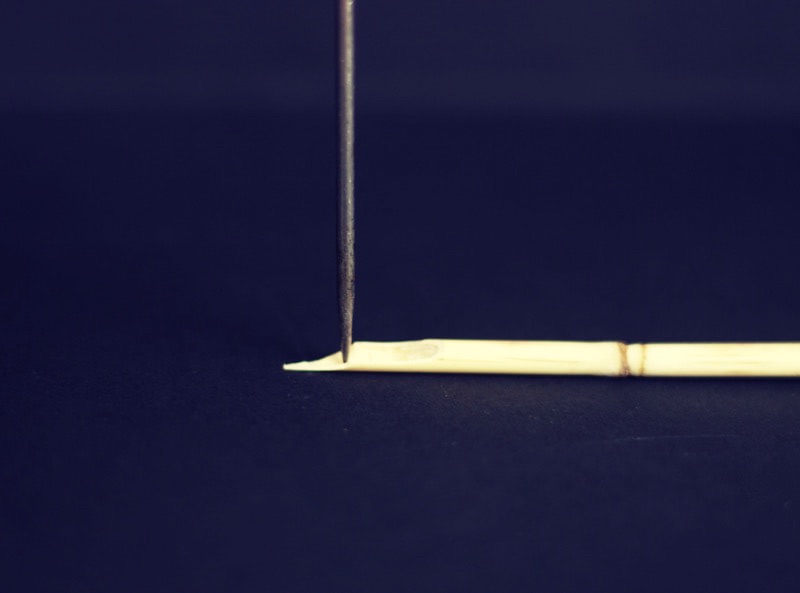
Making small hole in nib
Once you have made this hole you can then cut in the slit in the nib. Do this by placing the tip of your blade on the inside of the pen where the nib has been cut. Press down, gently. You are aiming to split the reed, not cut it.
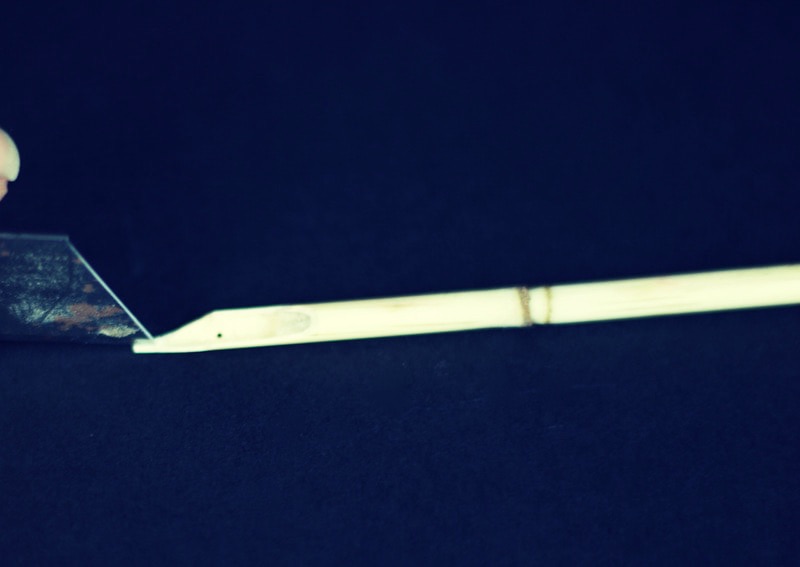
making the slit in the nib. The reservoir hole is pictured
Once you have made the slit, you are ready to use the pen. Just dip it into some ink, wipe off any excess on the side of the ink bottle and write with the nib flat on the paper. Remember, this pen will not last long but you can recut another nib whenever you need to.
