Many of the manuscripts I have been looking at are created by using ink and a feather quill. These pens were created using the primary flight (wing) feathers of quite large birds such as geese, swans and turkeys. Obviously if you want to use a swan feather you need to wait till it moults one of its wing feathers, however, after searching the local nature reserves for many hours I resorted to ordering some goose wing feathers from the internet.

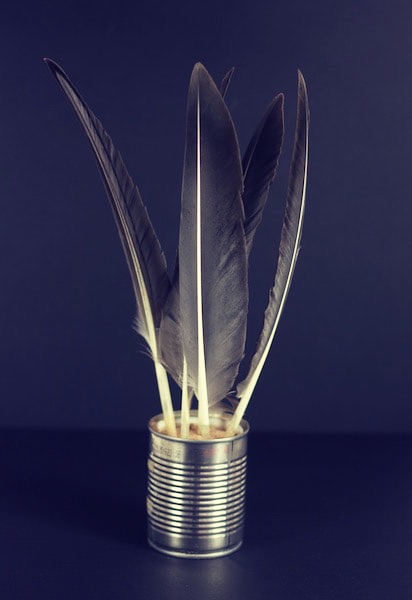
example of feathers
Firstly a note of caution. - all feathers are not created equal! I read a number of internet posts that suggested you can use feathers readily available in craft shops. However, after spending quite along time preparing the feathers I realised that the smaller feathers are not strong enough to write with and are a waste of time and money. You can see in the image above the difference between the goose wing feathers (middle and top of image) in comparison with the craft feather (bottom). So please learn from my mistake and get old of some large wing feathers.
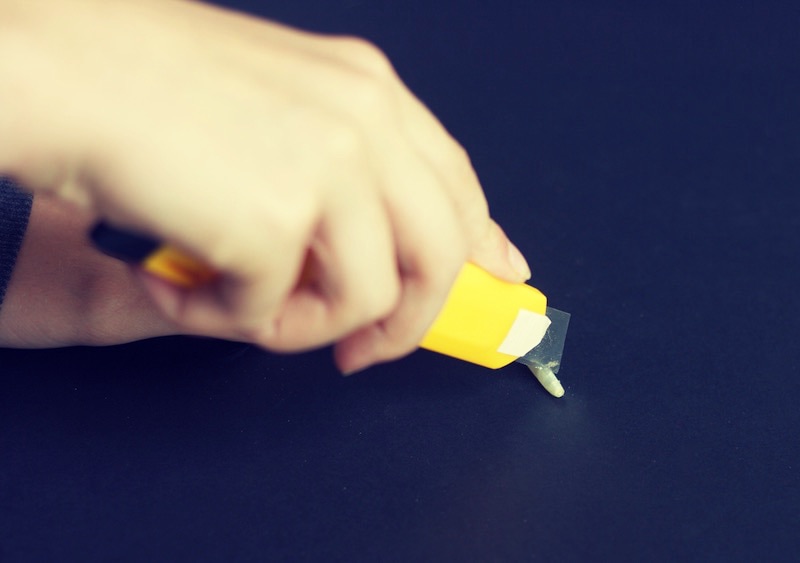
Cut off the end of the Feather
Once you have your feather you need to cut off the end of the feather (the bit that goes into the bird) this is important as it makes tempering the feather possible.
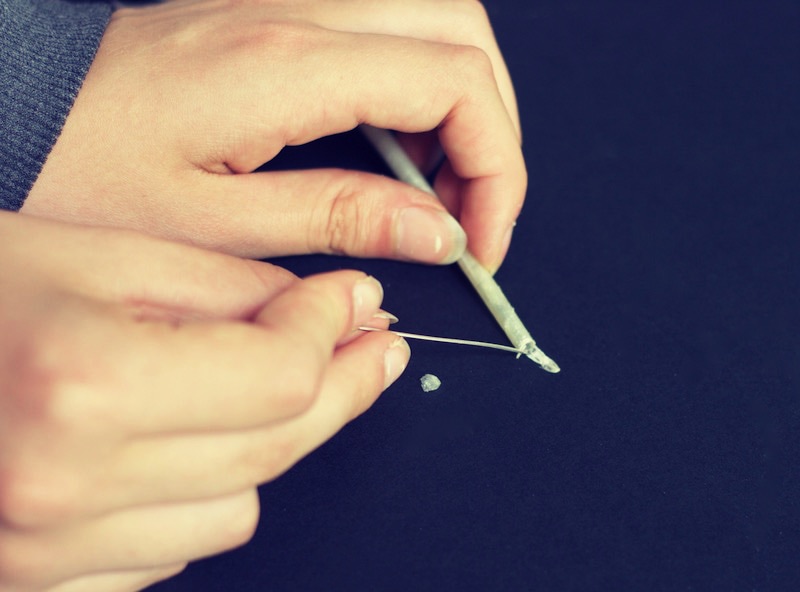
Remove contents
Once you have taken the end off of the feather get a pin and remove the dried membranes from the inside of the feather. You can see from the photo that there is quite a bit in there.
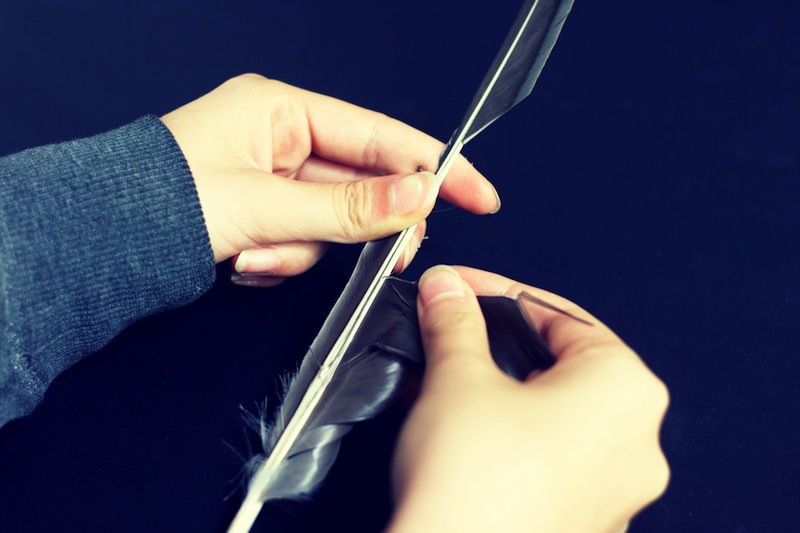
Remove the barb
There is quite a lot of hollywood glamour surrounding the quills you see in films. In real life the feathers had their barbs removed and so did not look like feathers at all. This makes the pen more comfortable to hold in the hand. You can remove the barbs with a sharp knife or by holding one side at a time and pulling sharply down, towards the tip. The barbs will then come away in two strips. You can clean up any remaining debris with a sharp knife.
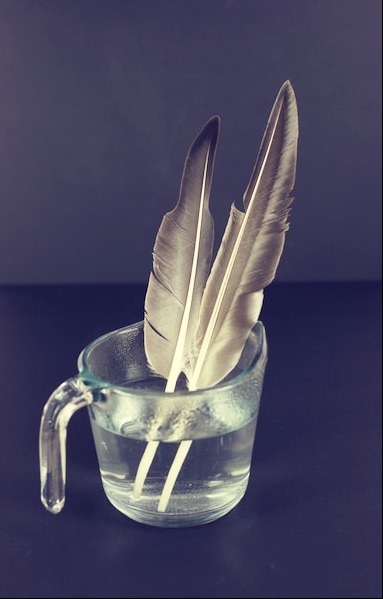
Soak the Feathers
Once you have prepared the feathers (sorry the ones in the picture do not have their barbs cut off) you need to stand them in a jug of boiling water. I left my feathers soaking overnight.
In order to now harden the quills you need to heat them. This can be done quite easily by filling an old tin can with sand (I used play sand) You then place the filled can in an oven heated to 180ºC. Leave the can in the oven for a good 30 minutes to heat the sand through then carefully remove the can from the oven and plunge your feathers into the hot sand. You will hear a lovely sizzle which is quite satisfying.
In order to now harden the quills you need to heat them. This can be done quite easily by filling an old tin can with sand (I used play sand) You then place the filled can in an oven heated to 180ºC. Leave the can in the oven for a good 30 minutes to heat the sand through then carefully remove the can from the oven and plunge your feathers into the hot sand. You will hear a lovely sizzle which is quite satisfying.
feathers in hot sand
Now you have tempered your feathers they will be harder and easier to cut into your quill.
In order to cut your quill it is a good idea to have a really sharp blade and make small cuts, don't get too confident until you have practiced a bit.
In order to cut your quill it is a good idea to have a really sharp blade and make small cuts, don't get too confident until you have practiced a bit.

First scoop cut from the feather
The first cut is a scoop taken out of the end of the feather. Aim to start about 1 inch back from the end and make several cuts to achieve a shape similar to the one pictured above.
second scoop cut taken from feather
The second section is another cut. Start about halfway down the cut you just made (approx 1/2 inch from the end) make a second scoop which tapers out to the end of the feather. I ALWAYS cut both sides separately as you don't want to put too much pressure on the feather and its a good idea to keep control. You are aiming for a curved sides that leave a flat section at the front of the quill.

cutting the slit in a quill
In order to make the ink flow when you use it you will need to cut a slit in the centre of the nib. Always lay the feather flat and make sure it it supported by a cutting mat/table or the feather will crush and break. You need to place the tip of your sharp knife onto the end of the quill and push gently. You are actually aiming for the feather to split rather than to cut it - don't worry it will happen quite easily.
Once you have made the slit make sure the ends of the quill are nice and square by trimming them with your knife - you are then ready to use the quill.
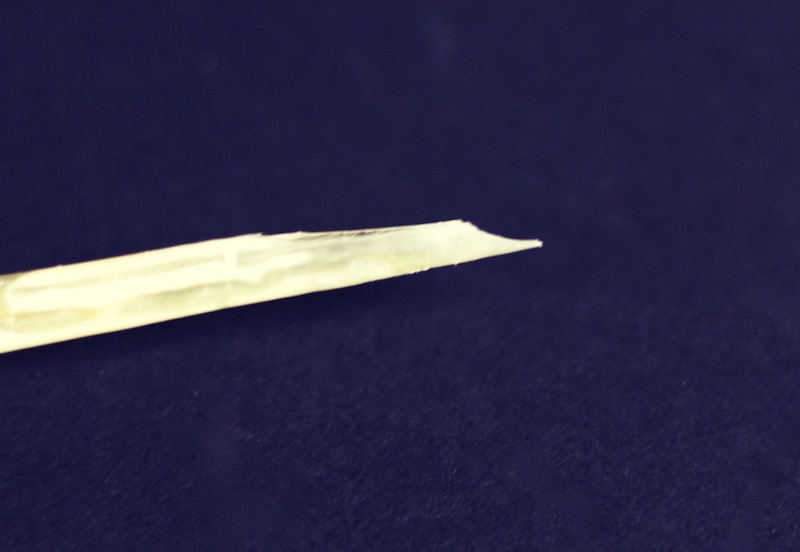
I have left the final image, below, quite large to show the detail of the cut. Remember do not press too hard when using as you want it to last but if you do have any disasters you can always re-trim the feather to give it another point.
Once you have made the slit make sure the ends of the quill are nice and square by trimming them with your knife - you are then ready to use the quill.
I have left the final image, below, quite large to show the detail of the cut. Remember do not press too hard when using as you want it to last but if you do have any disasters you can always re-trim the feather to give it another point.

detail of dressed quill showing slit cut into the nib
